Pro Tip: Hellebuyck and Brossoit Demo Skating Warmup
- Use three diagrams spaced roughly four feet apart to simulate short, medium, and long pushes across the crease.
- Set skate blades parallel to each line upon arrival to practice proper angle-setting mechanics as a built-in checkpoint.
- The blue line serves as both a drawing reference and an extended visual anchor to reinforce consistent movement patterns.
- This drill works effectively in tight ice spaces, making it practical for goalies with limited access to a full crease.
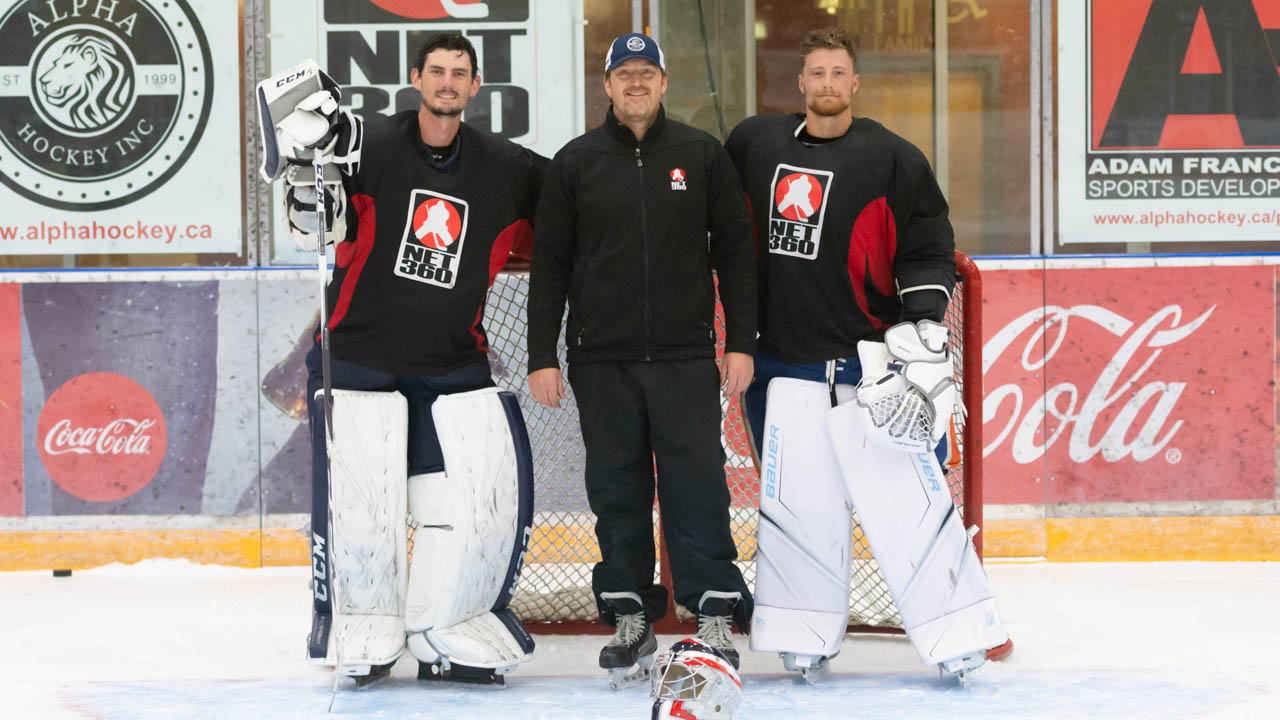
- Connor Hellebuyck and Laurent Brossoit used this warmup at James Jensen's NET360 goaltending camp, validating its application at the NHL level.
James Jensen is currently the goaltending coach with the Everett Silvertips of the Western Hockey League, and a long-time coach for current Winnipeg Jets, Arizona Coyotes, Detroit Red Wings, Buffalo Sabers goaltender Eric Comrie, and Calgary Flames Dustin Wolf. He shared this quick skating drill as a warm up while he was working with Jets goalies Laurent Brossoit and Connor Hellebuyck at the annual NET360 goaltending camp this past summer.
The funny thing about this skating drill is that I came up with it while working with a young Eric Comrie in California, and had to laugh when I heard him talking about it on the InGoal Podcast.
As Eric said on the show, ice wasn’t easy to come by in California, and he always wanted to work, so we would go to open ice to skate, but we rarely had a crease to work in because that’s where the figure skaters would be landing all their jumps. So, I came up with this.
Eric Comrie on Skating with James Jensen as a Youngster
Excerpt from the InGoal Radio Podcast Episode 26
I wanted to mimic three different movements with small, medium and large rotations, so I came up with three diagrams to simulate three different lengths of pushes across the crease. We would have our little area on the ice where we were allowed to work, so I’d get my marker out and draw these three diagrams, and I still use it today, even with pros.
It’s a good warm up drill, especially when space is tight, but can also be an easy way to work on movement mechanics by using the lines as a checkpoint to make sure when the goalie arrives on the new angle, their feet get set with skate blades parallel to that new line.
As you can see in the video, I used the blue line for the middle line of each of the three diagrams. In addition to providing an easy reference point for drawing the lines, the blue line provides goaltenders an extended visual reference when coming back to this point every time they go through the patterns, which can help aid proper movement.
If you use a crease as a guideline, it’s eight feet across, so you can draw each line roughly four feet, but the lines themselves aren’t an exact science. You’re just trying to trying to do something with small, medium and large rotations in movement, and if you’re off 10 degrees, it’s no big deal. The lines just give them a guideline on what they want to square on.
Where you start your goalie relative to the center point of each diagram determines how far you have to push and can be modified depending on your goal and the individual goaltender. In other words, if they are at the edges, it’s a bigger movement and they’ll probably need a T-push to get from tip to tip. But if they start closer to the middle point, where all three lines intersect, they may use a shuffle. We saw this in the video with Hellebuyck, especially the SMALL ROTATION, which we slow down below.
As mentioned, Hellebuyck started closer to where the three lines intersect and used a shuffle, which isn’t uncommon for bigger goalies. Broissoit worked from the end of the lines and used a t-push to move back and forth (unfortunately a coach stood right in front of the camera while was skating his first reps). While I have some movement staples as a coach that we’ll talk about below a bit, there is no absolute correct way to do these. The focal point is making sure the goaltenders square their feet parallel to each line as they move around.
As we slow down and pause the video above, we see that Hellebuyck doesn’t quite get set and square on a couple of reps, but remember these guys were just using this as a quick warm up before we went into more dynamic drills with multiple NHL shooters. Hellebuyck wasn’t even out on the ice to hear the first instructions when Brossoit started. If we were more focused on the details of their movement, those are the kinds of things you’d look for as a coach.
This can actually be a good one to draw first, not just because it’s so simple, but also because the length of the lines you draw can then be used as a guideline for the length of the lines in the SMALL and LARGE rotation lines. If you draw the T diagram first for this MEDIUM ROTATION movement, and then imagine lines running parallel to the blue line and draw your lines on the other two out to match those imaginary parallel planes.
Again, if we slow down the video, we see he’s not quite getting squared up on each line, but these guys were just trying to get their feet moving to start the day. But if you’re using this drill to focus on movement, keep an eye on the skates and the lines with each rep.
When we first started doing these with Eric Comrie, it was just about getting to that next spot with the skate blades parallel to the line so we were square and set, but over the years it has progressed as our understanding of movement efficiency has evolved. So now, as a coach you’re looking for how your goalie initiates the move: are they starting with a big c-cut with that lead leg, are they leading with the body and opening up to move? Or are they initiating the movement from the top down, as if they were tracking a pass, which should allow them to arrive in the new position with more of that angle and square-ness already established.
It’s an imaginary pass, but it you want to take this drill to another level, you could have coaches or other goalies out there passing a puck around with the lines helping you and your goalie understand if they’re truly getting square on each spot. Or you can lay down a glove or pucks further out along the line angles to give the goalie a focal point for visual attachment, and have them pretend they are watching that pass move across as they move from spot to spot.
Adding Recovery
The only thing that changes when we add recovery to the movement patterns is we maybe focus a little more on trying to get a visual attachment to our target line as we initiate each movement. Using the blue line as the middle point for all three patterns helps in this case, because it gives you a target beyond the lines we’ve drawn on the ice.
One thing I look for all the time is how much is that push skate twisting before or as they push?
If there is no twisting in that push skate, that’s telling me they’ve done a great job getting their rotation, getting angle to their new target and then pushing. It means they’ve got that push skate set parallel to their new target line, whereas if they leave that push leg and skate behind a bit you’re likely to see some twisting, often from the heel of the skate, as they push through.
Whether you see it in real time with the naked eye, or slowing it down on video and looking at it frame by frame. you’ll be able to see it. Either that skate is dug into the ice and all the energy is going to transfer and there’s no bleeding of energy in the push if it’s parallel to the target line, or it’s going to spin up and you’re going to lose a lot of power on that push.
We can see how well Hellebuyck does it with the recovery drills once he’s clear on the goal of squaring up to each line. There’s no wasted energy or spin to those skates when he’s pushing and almost every rep he’s square to his new angle. I always look at the skate blade.
Devan Dubnyk is a great example. Whenever I do a drill like this with him, the placement of the skate is perfect and it starts from the top down. The skate just doesn’t magically appear in the right spot, it comes from the rotation he gets leading from the top down, so when he finally plants that grip skate, it’s incredibly steady, it doesn’t slip, and there’s no wasted energy.
Using these simple lines can help a coach – and their goalie – identify those keys in movement, or as checkpoint during warm ups. It also comes in handy when you don’t have access to a crease to work in because the figure skaters ⛸ keep landing their jumps in it.